Wednesday, March 28, 2012

Fabric Mix

I've noticed a lot of advice around the design blog world lately on how to mix-and-match patterns. I'm soaking it up like a sponge. Here are some I've run across...


From Jamie Meares, owner of Furbish: "When combining prints, use a floral, geometric, and striped pattern. Also, be sure to mix scales — including one large scale print and one of a smaller scale. She recommends that at least one pair of pillows match exactly. Another pair can be different, as long as the scale of their pattern is the same. For example, if you have a large geometric print on one side, balance it out with another geometric that is similar in size."


(via)
Jenny Komenda posted an awesome guide that included these pearls of wisdom: "one big pattern, one small, one stripe, one geometric, one floral/organic, plus or minus one animal print. But, rules are made to be broken, so just have fun with it and stick with what really speaks to you."
(via)

Ashley at the Handmade Home has this advice:
1. Play it smart 
2. It's all about contrast
3. They just need to "go"
4. Carry it through
5. Reinvent the obvious

(via)

Sunday, March 25, 2012

Roman Shade DIY

Sometimes new neighbors move in and suddenly there is a need for window coverings where none were needed before. Such was the case for my mom. She consulted her decorator (lucky me!) and I decided to use the opportunity to try out a DIY project I had run across online. I used the directions on Little Green Notebook as my guide. She is amazing. Here is the before shot:


And after a bit of measuring and gluing - and my wonderful husband's installation skills:


I am planning to add a lining to the back. I purchased the lining at the fabric but then wanted to hang the shade first and see if we needed it. Also, I added a valance which isn't covered in the LGN tutorial. I just cut some extra material, glued cording to the bottom and then attached it to the back of the shade so it would flip over the top and hang in front. My mom and I are both pleased with how it turned out.

Thursday, March 15, 2012

Put An Elephant On It

We are all familiar with Portlandia's hilarious "Put A Bird On It" sketch poking fun at the ubiquitous use of the bird motif in decor. Well, lately I have been seeing elephants everywhere I look. Are they the new bird?


Tuesday, March 6, 2012

Striped Pillows

We've had boring tan pillows in our family room for years. They provided a bland backdrop to more decorative pillows and I was fine with the blandness for a long time until one day I decided enough was enough and it was time for a change. Bye-bye beige:


All the pillows are regularly thrown on the floor by the kids so I didn't want to spend a lot of money on them. My first thought was to try a chevron pattern. I tested out the Simply Spray fabric paint knowing that it was a gamble but possibly a fun DIY adventure. Well, it failed. I ended up with weird watery spots on the fabric. I was planning to find a chevron fabric I liked and just make new pillows and was strongly considering this one when I stumbled upon these in the clearance end cap at Target:


 That's right, $1.99! How could I resist? So for $8 plus tax I now have 2 new pillow covers:


Thursday, March 1, 2012

Pallet Headboard


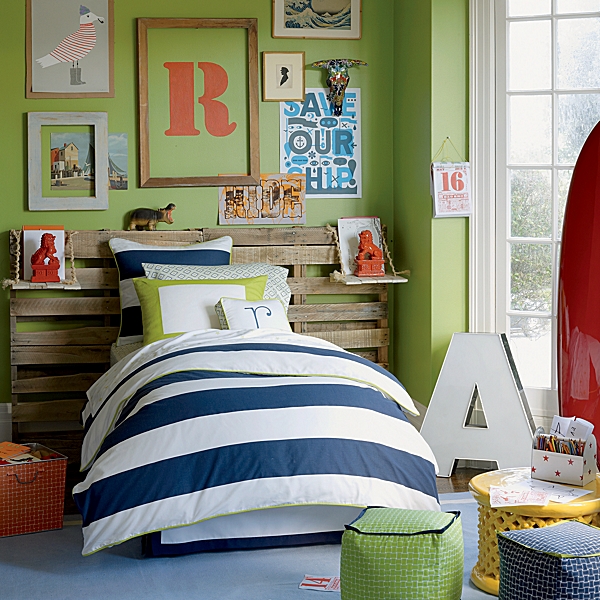
I mentioned in another post about how I spent the last day of 2011 and the first day of 2012 working on this headboard. My little boy is not quite so little anymore and it was time to graduate from the toddler bed to a twin. We didn't want to spend a ton of money on a headboard or bed and decided to go the mattress/boxspring/metal frame route which allows me to have fun with (and change) the headboard. I had seen a couple of boys rooms with headboards made from shipping pallets and I liked the idea. 


(via Serena & Lily)


Instead of keeping the wood raw or doing a stain I wanted to add some color. I decided to go with blue and green to match the color scheme of the new bedding I had in mind. First I had to sand it down:


I used blue paint that we already had on hand (purchased for a crib project we never got around to - oops!) and had the green matched to some Ikea boxes I had picked up for toy storage. And here is the finished project:


It works for now. And it cost less than $20 for the pallet, paint and supplies. So I don't have to feel guilty if/when I decide to change it. 


And, no, I didn't iron the sheets. (Don't tell AB!)